
Managing schedules for a multi-day corporate retreat often feels like solving a puzzle where every piece matters. Between shifting project timelines and individual commitments, pinning down dates that suit everyone can be a real challenge. That is why using an efficient tool that avoids unnecessary sign-ups is vital for busy American event coordinators. This guide explores how a clear purpose and smart availability management with platforms like WhenNOT create an inclusive, hassle-free planning experience.
Table of Contents
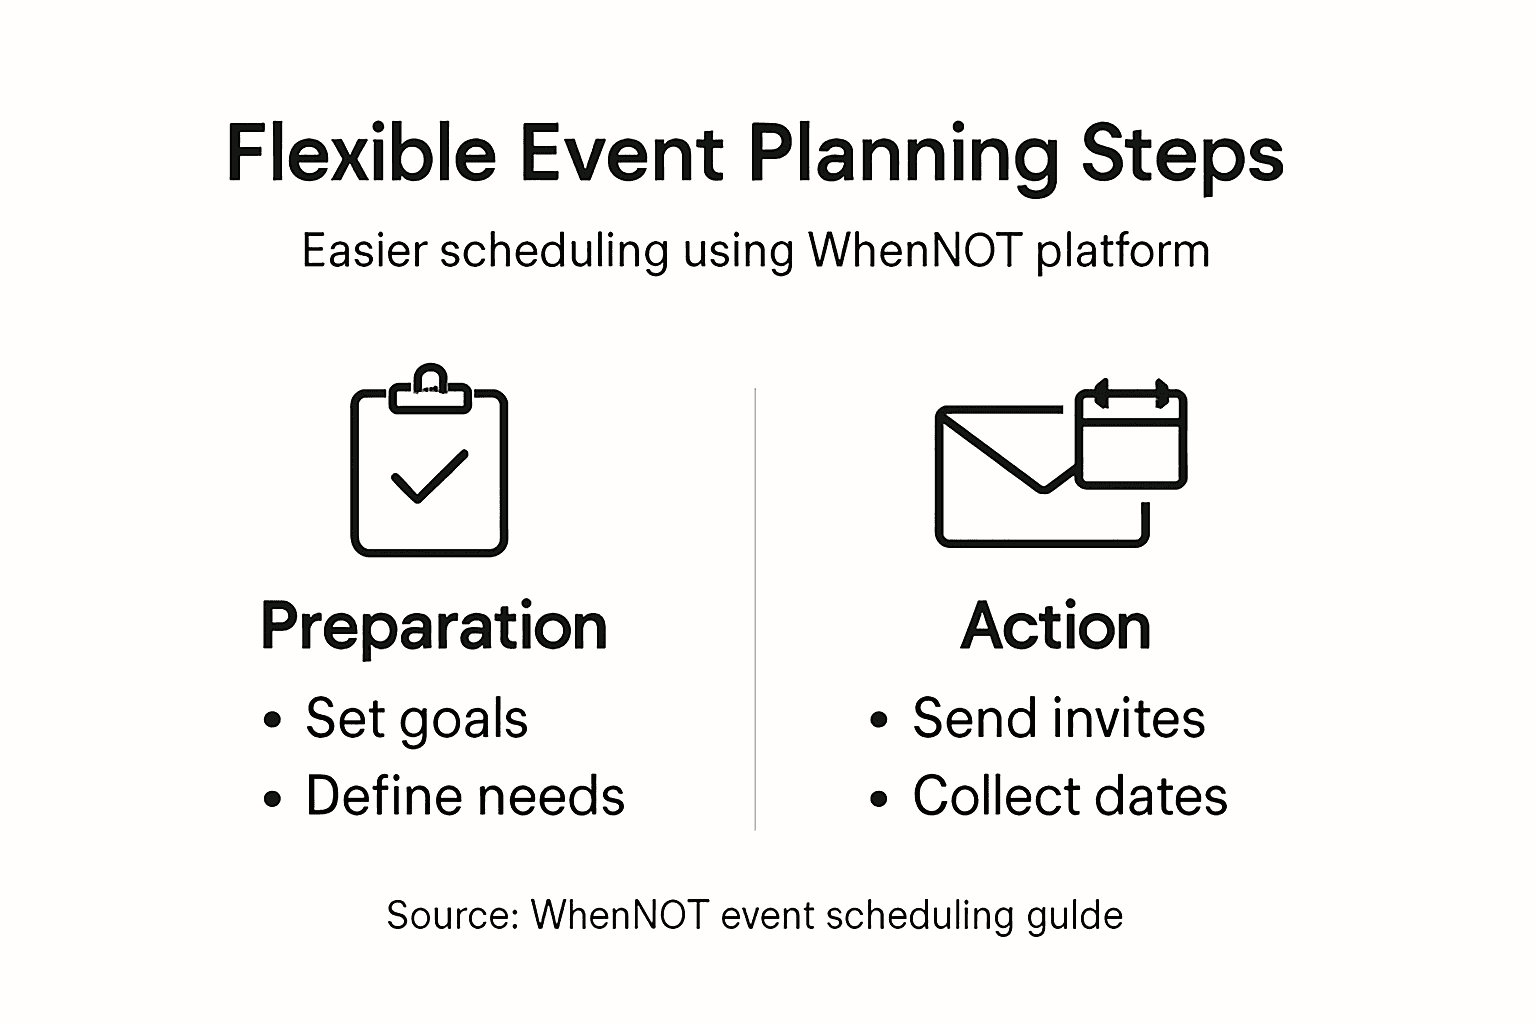
- Step 1: Define Event Goals And Requirements
- Step 2: Set Date Ranges And Invite Participants
- Step 3: Collect Unavailable Times Using Whennot
- Step 4: Visualize And Identify Optimal Event Dates
- Step 5: Confirm Selections And Notify Participants
Quick Summary
| Key Insight | Explanation |
|---|---|
| 1. Define clear event goals | Establish specific, measurable goals to prevent vague outcomes and misaligned expectations during the event planning process. |
| 2. Use WhenNOT for scheduling | WhenNOT simplifies collecting participant unavailability, making it easy to identify optimal event dates without extensive back-and-forth communication. |
| 3. Send clear invitations early | A well-crafted invitation with clear instructions and a link allows participants to mark unavailable dates efficiently, improving attendance rates. |
| 4. Confirm dates with transparency | Communicate finalized event details clearly, emphasizing the value of the gathering to boost commitment and ensure prepared attendance. |
| 5. Follow up for better responses | Sending reminder emails helps capture all participant availability, ensuring an inclusive decision-making process for date selections. |
Step 1: Define event goals and requirements
Before you send out a single scheduling link, you need to answer a fundamental question: What are you actually trying to accomplish with this event? Vague intentions lead to vague results. Clarity here prevents wasted time and disappointed participants later.
Start by identifying your core purpose. Are you bringing your team together for strategy sessions, team building, or a combination of both? For a multi-day corporate retreat, your goals might include improving cross-departmental collaboration, celebrating annual achievements, or planning next year's initiatives. Write these down. Don't just think about them. When you write goals, they become concrete commitments.
Next, apply SMART goal setting principles to lock in what success actually looks like. SMART means your goals are specific, measurable, achievable, relevant, and time-bound. Instead of "improve communication," aim for "increase cross-team project partnerships by 25 percent through structured networking sessions during the retreat." Instead of "boost morale," target "achieve 85 percent attendee satisfaction scores on post-event surveys."
Consider your audience carefully. Who must attend? Who might attend? What do they actually need from this event? Using the 5-W framework (Who, What, When, Where, Why) helps you nail this. Who are your key participants? What outcomes matter most to them? When does the timing work best? Where will your team gather? Why does this event matter to both the organization and individuals? Answering these forces you to align organizational objectives with real participant benefits.
Then identify your practical requirements. How many people will attend? What's your budget? Do you need meeting rooms, accommodations, or specific equipment? Understanding these constraints now determines what date ranges are actually realistic when you use WhenNOT to find the best times.
Here is a summary of common event constraints and their impact on planning decisions:
| Constraint | Why It Matters | Planning Action |
|---|---|---|
| Budget limitations | Determines allowable venues and extras | Select cost-effective suppliers |
| Headcount | Affects venue size and logistics | Choose appropriately sized locations |
| Technology needs | Impacts meeting format and interactions | Arrange necessary equipment or support |
| Travel & accommodation | Influences timing and location | Book group rates and block rooms |
| Dietary restrictions | Affects food and catering planning | Gather requirements in advance |
Pro tip: Document your goals and requirements in a single document before creating your event in WhenNOT. You'll reference this during scheduling to ensure your final dates actually support your intended outcomes.
Step 2: Set date ranges and invite participants
Now that you know what you want to accomplish, it's time to pick when your event happens and get your team informed. This step directly impacts whether people can actually show up and how engaged they will be.
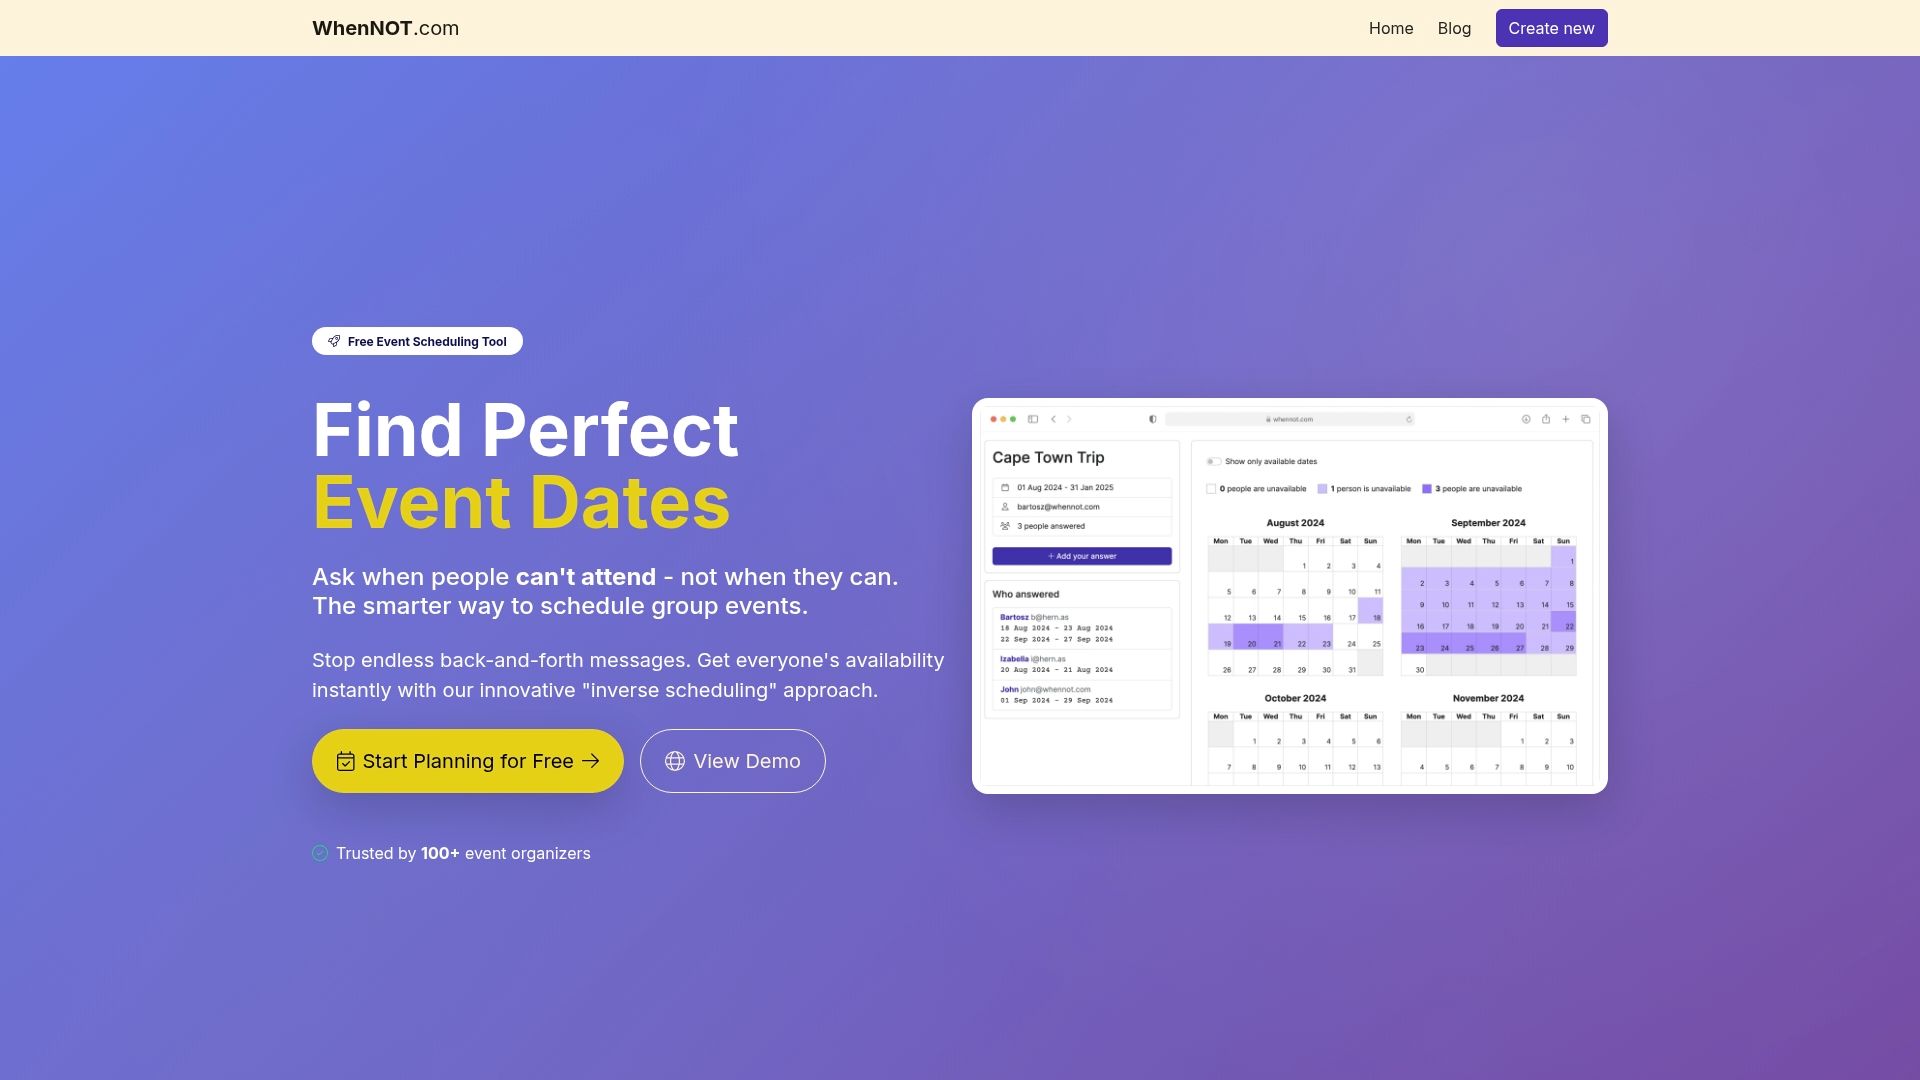
Start by identifying your realistic date window. For a corporate retreat, consider your fiscal calendar, major project deadlines, and when key decision-makers are available. You should also check if major holidays, industry conferences, or other company events fall within your target months. Once you have a window (say, April through June), input that range into WhenNOT. The platform then collects everyone's unavailable dates within that timeframe, making it easy to spot conflicts without asking people to manually list when they can attend.
When assessing calendar availability, remember that your participants operate across different schedules. Some team members might be traveling, on vacation, or managing other commitments. By casting a wide net with your date range upfront, you give people flexibility to mark their blocked dates rather than forcing them to predict their availability months in advance. This approach reduces back-and-forth emails asking "Can you do this date?"

Next, craft your invitation. Your message should clearly explain the event purpose, the date range you are considering, and why their attendance matters. Make the invitation professional yet warm. Include the unique WhenNOT link and simple instructions: "Mark the dates you are NOT available, and we will find a time that works for everyone." That is it. No sign-ups required. No complicated interfaces. People click the link, block their busy dates, and you instantly see the full picture.
Send invitations early and give people at least one week to respond. The sooner you send, the sooner you can lock in dates and communicate the final schedule. A quick follow-up email three days before your deadline helps capture responses from people who missed the first message.
Pro tip: Set your date range about 20 percent wider than you think you need. If you aim for May but include April and June, you capture more availability without annoying anyone, and you gain scheduling flexibility if conflicts emerge.
Step 3: Collect unavailable times using WhenNOT
Your invitation is sent and your unique WhenNOT link is in their inbox. Now it's time to let the platform do what it does best: gather everyone's unavailable dates without the back-and-forth hassle.
When participants click your WhenNOT link, they see a calendar covering your proposed date range. They simply mark the dates when they are NOT available. That is the entire process. No account creation. No complicated forms. No dropdown menus asking them to predict availability weeks in advance. They click, mark their blocked dates, and submit. The beauty of this approach is that people only need to identify dates they cannot attend, which is far easier than trying to remember when they are actually available.
As responses come in, WhenNOT visualizes everyone's unavailable dates concurrently on a single dashboard. You can see at a glance which dates have the fewest conflicts. When collecting unavailability data, this kind of real-time visibility helps you quickly identify optimal windows without waiting for all responses or manually compiling spreadsheets.
The table below compares collecting unavailable dates with WhenNOT versus traditional methods:
| Aspect | WhenNOT Platform | Manual Coordination |
|---|---|---|
| Data Collection | Instant and visual | Email back-and-forth |
| Participant Effort | Single click blocks | Manually list all dates |
| Conflict Detection | Automatic dashboard | Manual spreadsheet review |
| Response Tracking | Built-in reminders | Requires manual follow-ups |
Watch your response rate closely. Send a gentle reminder email around day three or four if you have not heard from everyone. Some people will miss the first message, and a quick follow-up significantly boosts participation. Do not nag, just remind. Give them one additional week to respond before you finalize dates.
Once you have responses from your key participants (aim for at least 80 percent), you can spot the clearest date windows. Look for dates where the least number of people marked unavailable. WhenNOT makes this visual and obvious. You might find that one or two specific dates stand out as perfect fits, or you might discover a full week where conflicts are minimal.
Before you announce the final date, check one more time with anyone who did not respond. A quick personal outreach to essential attendees ensures you are not scheduling around someone critical to the event.
Pro tip: Keep your date range open for responses for at least 10 days. Most people respond within the first 48 hours, but waiting longer captures procrastinators and people managing unexpected schedule changes.
Step 4: Visualize and identify optimal event dates
This is where WhenNOT makes your job remarkably easy. You do not need to manually cross-reference spreadsheets or send follow-up emails asking "What about this date?" The platform shows you everything at once.
Log into your WhenNOT dashboard and look at the calendar view. Each date displays how many people marked themselves as unavailable. The dates with the fewest blocks are your golden opportunities. You might see that May 15th has only two people unavailable, while May 20th has eight. The choice becomes obvious. WhenNOT's visualization approach transforms raw availability data into actionable insights you can process instantly.
Do not just pick the first date with the fewest conflicts. Look for patterns. Sometimes a full week has consistently low unavailability. Other times, you might find two separate windows that work equally well. If your event is flexible, having backup options is smart. A three-day retreat might work equally well June 8 through 10 or June 15 through 17. Both windows have minimal conflicts, so you choose based on your secondary priorities like venue availability or team preferences.
Check if your key decision-makers or essential team members have marked any unavailability. If your CFO cannot make the retreat because of a board meeting, you need to know that upfront. If three people from your largest department are out on a specific date, that might tip your decision toward another window. Look beyond the numbers and consider who is attending.
Once you have identified your top date choice, verify it one more time by scanning the full list of unavailable people. Make sure nobody critical is blocked out. Then finalize your decision and communicate it immediately to your team.
Pro tip: Screenshot or export your WhenNOT dashboard results before announcing the final date. This documentation proves you made an inclusive, data-driven decision and helps resolve any last-minute scheduling disputes.
Step 5: Confirm selections and notify participants
You have chosen your date. Now comes the final critical step: telling everyone with clarity and confidence. A strong confirmation message turns your scheduling decision into a locked-in commitment from your team.
Craft a notification email that includes all the essential details. State the event name, the confirmed date range, start and end times, and the location or meeting format. Be specific. Instead of saying "our retreat in May," write "our annual corporate retreat, June 8 through 10, 2024, at the Riverside Conference Center." Clarity prevents confusion and last-minute scheduling conflicts.
Go beyond logistics. Explain why this event matters and what participants should expect. Mention key activities, speakers, or outcomes. Event confirmation emails that emphasize value and purpose increase attendance and engagement. People who understand the retreat's importance are more likely to prioritize it and attend fully prepared.
Include practical information your team needs. Provide directions or parking details. Mention whether breakfast and lunch are provided. Clarify dress code if there is one. If people need to bring anything or prepare ahead, say so. Answer the questions people will ask so they do not have to email back and forth with you.
Add calendar integration options if possible. A link to add the retreat to their calendar removes friction. It also creates a visual reminder that strengthens commitment. When confirmation messages reinforce commitment, you see fewer no-shows and better preparation from attendees.
End with a clear call to action. Tell people how to reach you if they have questions or need to make last-minute changes. A direct phone number or email address shows you are accessible and serious about the event. Send this confirmation email within 24 hours of finalizing your date.
Pro tip: Include a brief note thanking participants for their availability input and explaining how WhenNOT helped you find a date that works for the maximum number of people. This transparency builds trust and shows you made a thoughtful, inclusive decision.
Simplify Your Group Event Planning with WhenNOT Today
Planning multi-day events can be frustrating when traditional scheduling tools ask for available dates instead of unavailable ones. This article highlights common pain points like back-and-forth emails, unclear participant availability, and managing flexible date ranges that waste your time and drain your energy. When planning team retreats or corporate gatherings, you want clarity and confidence—not endless confusion over who is free when.
With WhenNOT’s unique inverse scheduling method, you only ask participants when they are not available. This removes guesswork and reduces the effort needed by everyone in your group. The instant, visual dashboard lets you quickly spot the best date windows with minimum conflicts so your event planning feels effortless and inclusive. Whether you are coordinating your next corporate retreat, family gathering, or group trip, WhenNOT’s simple no-account-needed tool supports your goals perfectly.
Experience stress-free scheduling by visiting WhenNOT and creating your free event today. Unlock the power to plan flexible events easily with a tool designed specifically to save you time while keeping everyone involved. Don’t wait—turn your next event planning challenge into a smooth success now.
Frequently Asked Questions
What are the first steps to planning an event using WhenNOT?
To start planning an event with WhenNOT, first define your event goals and requirements clearly. Identify your objectives, audience, and logistics, and document these details to guide your scheduling process.
How can I collect unavailable dates from participants using WhenNOT?
You can collect unavailable dates by sending a unique WhenNOT link to your participants. They can easily mark their unavailable dates on the calendar without needing to create an account, simplifying the process and reducing the need for back-and-forth communication.
How do I determine the best date for my event after collecting responses?
After collecting unusable dates, log into your WhenNOT dashboard to view the calendar that displays the number of unavailability for each date. Identify the dates with the fewest blocks, and check for critical attendees' availability to finalize a date that works for most participants.
What should I include in the confirmation email after finalizing the event date?
Your confirmation email should include the event name, confirmed dates and times, location, and purpose of the event. Additionally, provide practical information such as directions, parking details, and any relevant contact information for questions or changes.
How long should I keep the date range open for responses on WhenNOT?
It is recommended to keep the date range open for at least 10 days to capture all responses. This timeframe allows participants to review their schedules and respond without feeling rushed, increasing the likelihood of comprehensive input.
Why is using WhenNOT beneficial for event scheduling?
Using WhenNOT streamlines the process of gathering availability, making it easier to identify optimal event dates. It saves time and reduces frustration by visualizing unavailability data, allowing for quicker, informed scheduling decisions.