
Group event planning can turn into a maze of emails and missed messages if you do not start with a clear strategy. Over 50 percent of organizers face scheduling conflicts simply because the basics get overlooked. Nailing down your event details and understanding how to collect and coordinate everyone’s availability makes a huge difference. This guide lays out each practical step to make group scheduling easier and far more effective.
Table of Contents
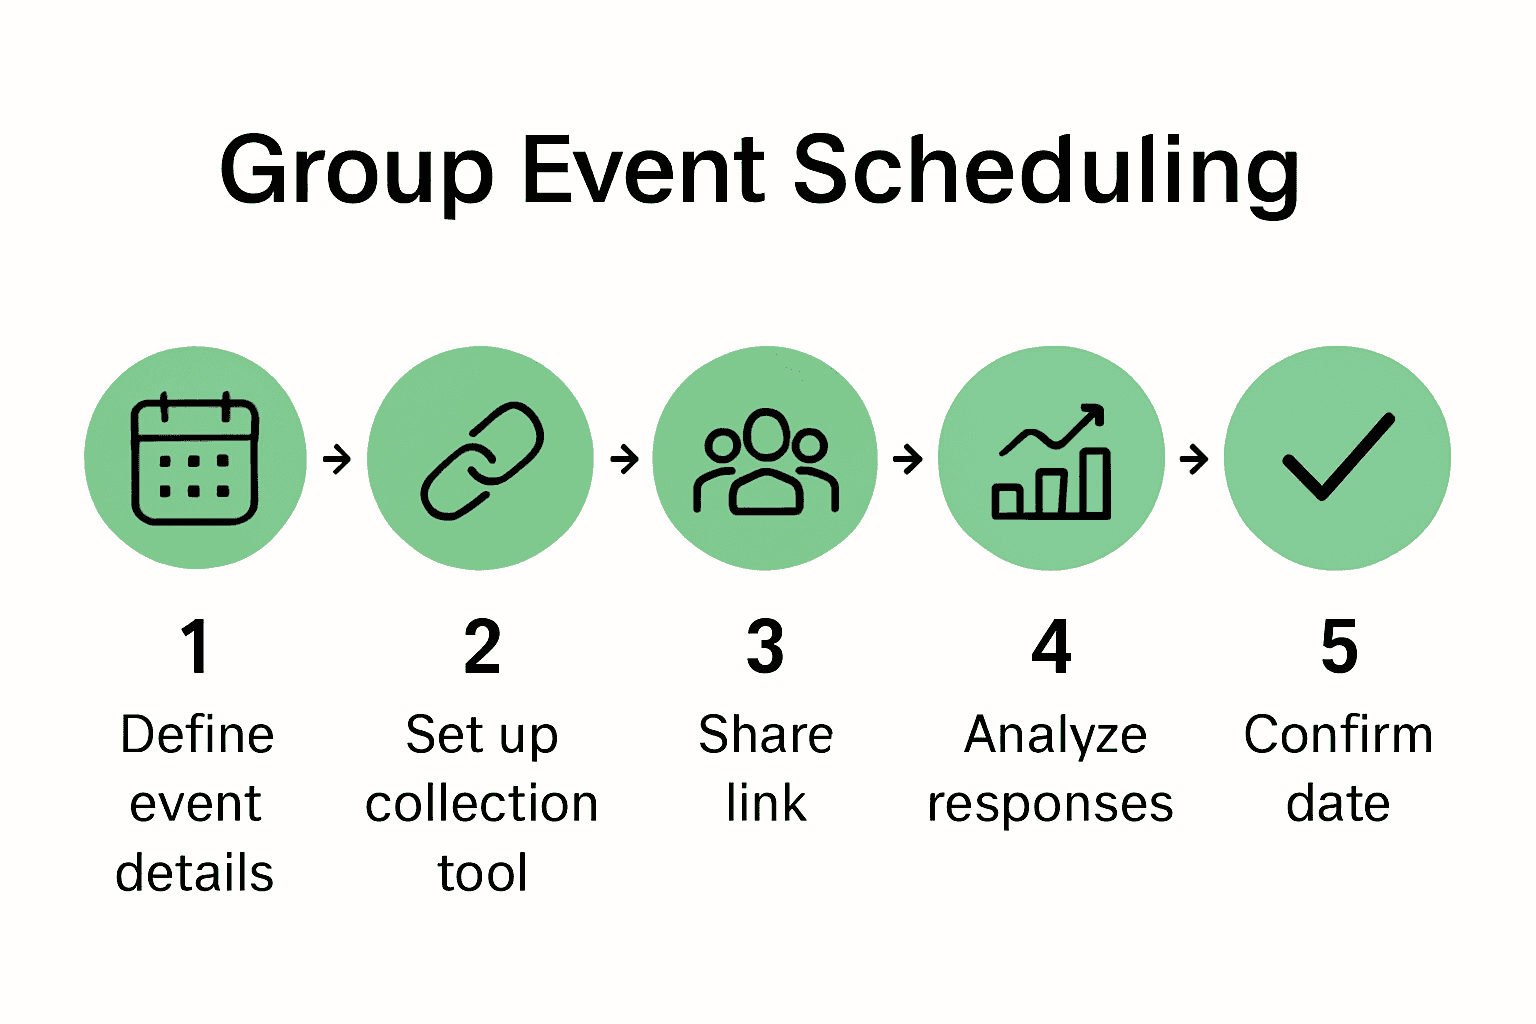
- Step 1: Define Event Details And Date Range
- Step 2: Set Up Event Availability Collection Tool
- Step 3: Share Participation Link With Group
- Step 4: Gather And Review Participant Responses
- Step 5: Confirm Optimal Event Date And Notify Attendees
Quick Summary
| Key Point | Explanation |
|---|---|
| 1. Define event details clearly | Create concise, descriptive event titles to effectively communicate the purpose and context of the gathering. |
| 2. Choose a flexible date range | Select a 7 to 10 day period that avoids holidays, allowing maximum flexibility for participants' availability. |
| 3. Use an intuitive scheduling tool | Implement a user-friendly tool to gather participant availability without requiring complex sign-ups, enhancing engagement. |
| 4. Communicate effectively with participants | Share event information through appropriate channels and provide clear instructions, including deadlines for responses. |
| 5. Analyze and confirm event date | Review participant responses to identify optimal dates, then communicate decisions transparently to all attendees. |
Step 1: Define event details and date range
Defining clear event details and establishing a comprehensive date range forms the critical foundation for successful group scheduling. Accurate initial planning determines how smoothly participants can indicate their availability and ultimately helps you select the optimal time for your gathering.
According to University of Missouri St Louis, creating a concise yet descriptive event title is paramount. Your event title should quickly communicate the core purpose and type of gathering. For a family reunion, you might use "Johnson Family Summer Reunion 2024". For a work retreat, consider "Marketing Team Strategic Planning Offsite". Each title provides immediate context about the event type, participants, and general timeframe.
When establishing your potential date range, think expansively but strategically. Select a span that offers genuine flexibility for all participants. For multi day events like retreats or family gatherings, consider a 7 to 10 day window that allows maximum participant accommodation. Pro tip: avoid holiday weekends or known high conflict periods when scheduling group events. Your goal is creating a date range where finding mutual availability becomes straightforward and stress free.
Once you have a clear title and potential date range, you are ready to share your event and begin collecting participant availability information. The next step involves inviting participants and helping them easily mark their unavailable dates.
Step 2: Set up event availability collection tool
Now that you have defined your event details and potential date range, the next critical step is selecting and configuring an efficient availability collection tool that simplifies group scheduling. The right tool can transform a potentially complicated process into a straightforward experience for all participants.
As AgileSoftLabs demonstrates with their event management solutions, modern scheduling platforms can dramatically streamline coordination efforts. For group events, look for a tool that allows participants to quickly and easily indicate their unavailable dates without requiring complex sign ups or account creation. How to Streamline Group Availability can provide additional insights into selecting the most effective platform.
When setting up your availability collection tool, prioritize user friendliness and accessibility. Choose a platform that generates a simple shareable link participants can click to mark their unavailable dates. This approach reduces friction and increases the likelihood of getting comprehensive responses from your group. Pro tip: test the tool yourself first to ensure the process is truly intuitive and quick for your participants.

With your availability collection tool configured, you are now ready to invite participants and begin gathering their scheduling preferences. The next step will involve distributing your event link and encouraging timely responses.
Step 3: Share participation link with group
With your event details finalized and availability collection tool configured, the next crucial step is sharing your participation link efficiently and effectively with all potential participants. This seemingly simple task requires strategic communication to ensure maximum response and engagement.
According to AgileSoftLabs, seamless event participation begins with a well distributed link. When sharing your event link, consider the communication channels that work best for your specific group. For professional settings, email or workplace messaging platforms might be most appropriate. For family gatherings, a group text or family chat app could be more effective. 6 Ways to Simplify Scheduling offers additional strategies for effective link distribution.
When sharing your participation link, include a clear concise message explaining the event purpose, date range, and simple instructions for marking availability. Provide a friendly deadline for responses to create a sense of urgency and help participants prioritize completing the task. Pro tip: send a friendly reminder midway through your response window to boost participation rates and ensure you collect comprehensive availability information.
With your participation link shared and participants beginning to respond, you are now positioned to track responses and prepare for the next stage of event planning.
The upcoming step will involve monitoring participant availability and identifying potential optimal meeting times.
Step 4: Gather and review participant responses
After distributing your participation link, the next critical phase involves systematically gathering and analyzing the availability responses from your group members. This step transforms individual scheduling inputs into a comprehensive view of potential meeting times.
AgileSoftLabs highlights the importance of robust analytics in tracking participant responses. When reviewing responses, look for patterns of unavailability that emerge across your group. Pay attention to percentage of responses received, noting that not every participant will respond immediately. 7 Top Examples of Scheduling Tools can provide additional strategies for effective response tracking.
As you review participant responses, create a visual or spreadsheet overview that highlights common unavailable periods and potential windows of opportunity. This approach helps you quickly identify the most promising dates that accommodate the maximum number of participants. Pro tip: set a final response deadline and send a gentle reminder to those who have not yet submitted their availability to ensure comprehensive data collection.
With participant responses gathered and analyzed, you are now prepared to select the optimal event date that works best for your group. The next step will involve making the final date selection and sending out confirmations to your participants.
Step 5: Confirm optimal event date and notify attendees
After carefully analyzing participant availability, you have reached the critical moment of finalizing your event date and communicating the details to all participants. This step transforms your planning efforts into a concrete event commitment that requires clear and thoughtful communication.
AgileSoftLabs emphasizes the importance of systematic event notification processes. When confirming your event date, craft a concise message that includes the confirmed date, time, and any essential logistical details. Step by Step Team Scheduling recommends providing comprehensive yet digestible information to ensure all participants feel fully informed and prepared.
When notifying attendees, be transparent about how you selected the final date and express appreciation for their participation in the scheduling process. Include all relevant event information such as location, expected duration, and any preparation requirements. Pro tip: send the notification through the same communication channel you used for initial availability collection to maintain consistency and improve response rates.
With your event date confirmed and notifications sent, you have successfully navigated the complex process of group scheduling. The next phase involves final event preparations and addressing any follow up questions from participants.
Simplify Your Group Scheduling with a Smarter Approach
Planning group events can quickly become overwhelming when trying to gather everyone's availability across multiple days. You want a clear, stress-free way to collect participant unavailable dates without endless back-and-forth messages or complicated sign-ups. The article highlights the crucial steps of defining event details, using an availability collection tool, sharing participation links, gathering responses, and confirming the best date. These steps target the pain points of scheduling delays, confusing communication, and difficulty pinpointing the optimal meeting time.
WhenNOT revolutionizes this process by asking when participants are not busy rather than when they are available. This inverse scheduling drastically reduces confusion and helps you find the best dates faster. By sharing a simple link, attendees can easily mark unavailable days with no account needed. The platform then visualizes all responses, making it effortless to identify ideal event dates.
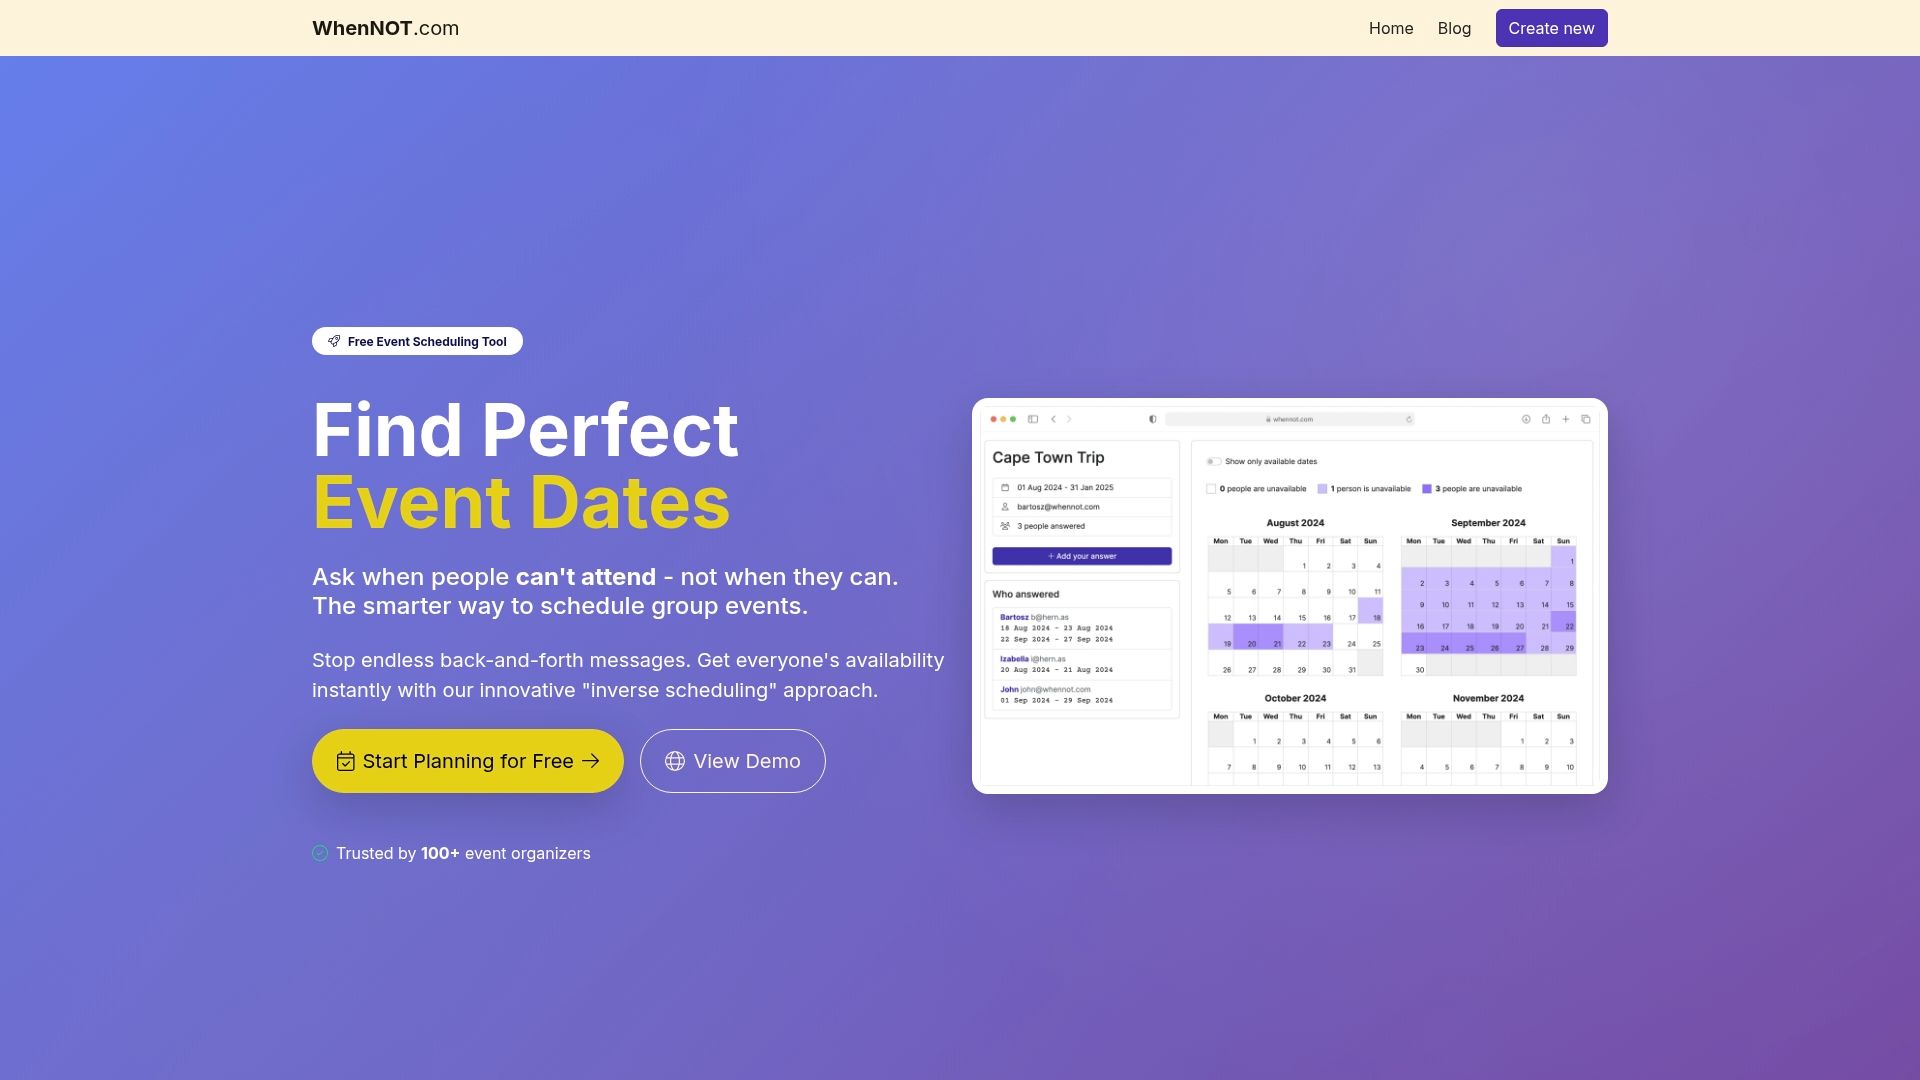
Ready to master event availability collection and eliminate planning headaches right now Visit WhenNOT to try the free, user-friendly tool that transforms group event planning. Discover how quickly you can set event details, share your custom link, and finalize your event date without the usual stress and delays. Start simplifying your next family reunion, work retreat, or social gathering today by learning more at WhenNOT and see how step-by-step team scheduling can help you take control of your group’s time.
Frequently Asked Questions
How can I define event details effectively for optimal scheduling?
To define event details effectively, create a clear and concise event title that conveys the core purpose of your gathering. Include specifics like date range and event type to foster better understanding and engagement from participants.
What steps should I take to set up an event availability collection tool?
Choose a user-friendly platform that allows participants to mark their unavailable dates easily. Ensure that the tool can generate a simple shareable link and test it to confirm its usability before distributing it to participants.
What is the best way to share my event participation link?
Share your event participation link through the communication channels that your group prefers, such as email or messaging apps. Craft a clear message that explains the event's purpose and includes a friendly deadline for responses to encourage participation.
How do I gather and analyze participant responses for scheduling?
Gather participant responses by monitoring the data collected from your availability tool. Review the responses to identify patterns of unavailability and potential meeting windows, creating a visual overview to simplify the decision-making process.
How should I confirm the optimal event date to attendees?
To confirm the optimal event date, compose a concise notification that includes the confirmed date, time, and any necessary logistical details. Make sure to express appreciation for participants' input during the scheduling process to enhance engagement.