What Is an Event Planning Workflow?
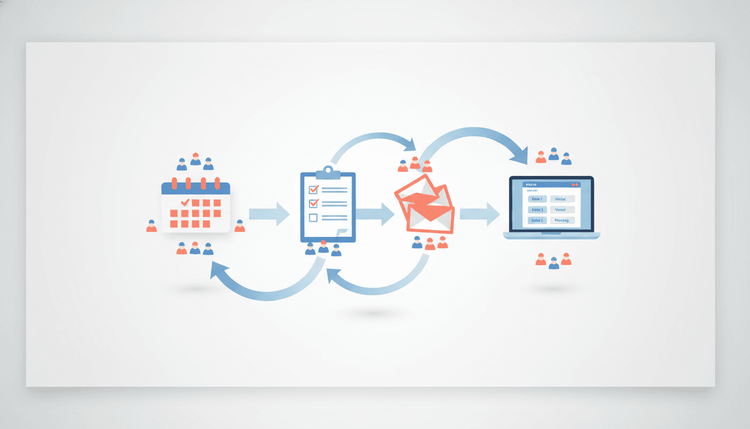
An event planning workflow is a repeatable sequence of steps that takes you from "we should do something" to "that was amazing." It covers every decision point along the way: setting goals, picking dates, booking venues, sending invites, running the event, and following up afterward. Without a workflow, event planning feels scattered. With one, each phase has a clear purpose and a finish line.
Think of it as a roadmap. You would not drive across the country without knowing your route. The same logic applies to planning any gathering, whether it involves 10 people or 10,000. A structured event planning workflow keeps your timeline on track, your budget in check, and your stress levels low.
Phase 1: Ideation and Goal Setting
Before you book a venue or create a guest list, answer one question: why are you hosting this event? The answer shapes every decision that follows. A team-building retreat has different needs than a product launch or a neighborhood block party. Getting clear on your purpose early saves hours of rework later.
Start by writing down three things:
- The goal. What should attendees walk away with? New connections, a celebrated milestone, useful knowledge?
- The audience. Who are you planning this for? Coworkers, family members, community members, clients?
- The format. Will it be in person, virtual, or hybrid? A single session or spread across multiple days?
Once you nail these basics, brainstorm event planning ideas that match your goal. Keep a running list. You will narrow it down in the next phase, but creative freedom at this stage leads to better outcomes.
Set Your Budget Early
Your budget determines what is realistic. List your must-haves (venue, food, A/V equipment) and your nice-to-haves (custom swag, live entertainment, professional photography). Assign rough cost estimates to each. This prevents scope creep and gives you a clear ceiling for vendor negotiations.
Phase 2: Date Selection and Scheduling
Choosing a date sounds simple. In practice, it is one of the most frustrating parts of any event planning workflow. You are juggling the availability of venues, speakers, vendors, and (most importantly) your attendees. Pick the wrong date and your turnout suffers, no matter how great the rest of the event is.
Here are the basics of smart scheduling:
- Start early. The more lead time you give yourself, the more options you have. For large events, begin scheduling 3 to 6 months in advance. Smaller gatherings need at least 4 to 6 weeks.
- Check for conflicts. Holidays, local events, school schedules, and industry conferences can all compete for your audience's attention.
- Consider timing. The science behind timing shows that when you schedule matters just as much as what you schedule. Weekday evenings work for professional networking. Weekend mornings work for family-friendly events.
Why Date Selection Fails (and How to Fix It)
Most event planners pick a date first and then ask people if they can make it. That is backward. When you choose a date in isolation, you are guessing. And guessing leads to low attendance, last-minute cancellations, and frustrated organizers.
The fix is to flip the process. Poll your key attendees and stakeholders before locking in a date. Find out which windows work for the majority, then choose the option with the highest overlap.
This is exactly the kind of problem WhenNOT solves. Instead of sending dozens of "does this date work?" messages, you create a quick poll, share it with your group, and let everyone mark their availability. Within minutes, you can see which dates have the most overlap and lock in your schedule with confidence.
Phase 3: Logistics and Vendor Coordination
With your date set, shift your focus to the physical (or virtual) details. This phase of the event planning workflow covers everything that makes the event actually happen: the space, the food, the tech, and the people who provide them.
Break logistics into three categories:
Venue and Space
- Book your venue early. Popular spaces fill up months in advance.
- Confirm capacity, accessibility, parking, and A/V capabilities.
- For virtual events, choose a reliable platform and test it before the event.
Vendors and Suppliers
- Get quotes from at least three vendors for catering, rentals, and entertainment.
- Sign contracts that include cancellation policies and payment schedules.
- Create a shared contact sheet with every vendor's name, phone number, and delivery time.
Team and Volunteers
- Assign clear roles. Who handles registration? Who manages the timeline? Who is the point of contact for vendors?
- Hold a brief kickoff meeting to align everyone on responsibilities and deadlines.
For multi-day events, logistics get more complex. Build a day-by-day timeline that maps every setup task, session, meal, and breakdown window. The more specific your timeline, the smoother your event runs.
Phase 4: Invitations and RSVP Management
Your event is only as good as the people who show up. This phase focuses on getting the right people to commit and tracking their responses so you can plan accordingly.
Craft a Clear Invitation Your invitation should answer five questions in under 30 seconds:
- What is the event?
- When is it?
- Where is it?
- Why should I attend?
- How do I RSVP?
Skip the lengthy paragraphs. Use bullet points, bold text, and a single call-to-action button. Send invitations at least 3 to 4 weeks before the event for casual gatherings and 6 to 8 weeks before for formal or corporate events.
Track RSVPs in One Place Scattered RSVPs lead to inaccurate headcounts, wasted catering budgets, and seating chaos. Use a centralized system to collect and monitor responses. Spreadsheets work for small events, but they fall apart at scale. A dedicated scheduling and polling tool keeps everything organized and gives you real-time visibility into your numbers.
Send Reminders People forget. Send a reminder one week before and another one day before the event. Include the key details (date, time, location, parking info) and a link to update their RSVP if plans have changed.
Phase 5: Event Day Execution
All your planning comes down to this. Event day is about execution, not improvisation. If you have followed your event planning workflow up to this point, the hard decisions are already made. Now your job is to manage the timeline and handle surprises.
Morning-of Checklist
- Arrive early. Give yourself at least 90 minutes before guests arrive.
- Walk the space. Check seating, signage, A/V equipment, and restrooms.
- Brief your team. A 10-minute huddle covers last-minute changes and confirms who is responsible for what.
- Test everything. Microphones, projectors, Wi-Fi, music playlists, and lighting.
During the Event
- Stick to the schedule, but stay flexible. A 5-minute delay is fine. A 30-minute delay signals poor planning.
- Designate one person as the "problem solver" who handles issues so the host can focus on guests.
- Capture photos and videos for post-event content and future promotions.
- Collect feedback in real time if possible. A simple QR code linking to a short survey works well.
Wind Down
- Thank vendors and volunteers before they leave.
- Secure any rented equipment and confirm return timelines.
- Do a quick walkthrough to make sure nothing is left behind.
Phase 6: Post-Event Follow-Up
The event is over, but your event planning workflow is not. What you do in the 48 hours after the event determines whether attendees remember it as a one-time thing or the start of an ongoing relationship.
Send a Thank-You Message Within 24 hours, send a short thank-you email or message to every attendee. Include a highlight or two from the event and, if applicable, a link to photos or recordings.
Review Your Feedback Compile survey responses and team observations. Look for patterns. What did people love? What felt rushed or confusing? Use this data to improve your next event.
Run the Numbers Compare your actual costs against your budget. Track attendance versus RSVPs. Calculate your no-show rate. These metrics tell you how well your planning process worked and where to tighten things up next time.
Document Your Workflow Save your timeline, vendor contacts, checklists, and lessons learned in a shared folder. The next time you plan an event, you will not start from scratch. You will start from experience.
Event Planning Workflow Comparison Table (by Event Size)
Not every event needs the same level of planning. Here is how the workflow scales based on the size of your gathering:
| Phase | Small (under 30 people) | Medium (30 to 150 people) | Large (150+ people) |
|---|---|---|---|
| Ideation and Goals | Informal brainstorm, 1 to 2 organizers | Structured planning meeting, small committee | Formal project plan, dedicated event team |
| Date Selection | Group text or quick poll | Availability poll with key stakeholders | Multi-round scheduling with venue and speaker coordination |
| Logistics | Single venue, minimal vendors | 2 to 3 vendors, A/V setup, signage | Multiple vendors, contracts, insurance, permits |
| Invitations and RSVPs | Direct message or email | Email campaign with RSVP tracking | Multi-channel outreach (email, social, direct mail) |
| Event Day | Host manages everything | Team of 3 to 5 with assigned roles | Full crew with walkie-talkies and a minute-by-minute runsheet |
| Follow-Up | Personal thank-you messages | Thank-you email plus survey | Detailed report, stakeholder debrief, media recap |
| Lead Time | 2 to 4 weeks | 6 to 12 weeks | 3 to 6 months |
Tools That Streamline Your Workflow
A strong event planning workflow depends on having the right tools at the right time. You do not need a dozen apps. You need a few reliable ones that cover scheduling, communication, and project management.
Scheduling and Availability The biggest bottleneck in event planning is finding a date that works for everyone. Traditional back-and-forth messaging wastes time and creates confusion. WhenNOT removes that friction entirely. You create an event poll, share a link, and your group marks their availability. The tool highlights the best dates automatically, so you spend minutes instead of days on scheduling. It is especially useful for multi-day events where coordinating across multiple schedules gets complex fast.
Communication Choose one primary channel for event-related updates and stick with it. Mixing email, text, and group chat leads to missed messages and duplicated conversations.
Project Management For medium and large events, a task board (like a kanban board) helps your team track what needs to happen, who owns each task, and what the deadline is. Even a shared checklist works for smaller events.
For a deeper look at the different categories of scheduling tools available, check out our breakdown to find the right fit for your workflow.
FAQ
How far in advance should I start planning an event?
It depends on the size. Small events (under 30 people) need 2 to 4 weeks of lead time. Medium events (30 to 150 people) should start planning 6 to 12 weeks in advance. Large events (150+ people) require 3 to 6 months of preparation. The more complex the logistics, the earlier you should begin.
What is the hardest part of event planning?
For most organizers, date selection and RSVP management cause the most headaches. Coordinating availability across a large group is time-consuming, and tracking responses across multiple channels leads to errors. Using a centralized scheduling tool simplifies both tasks significantly.
How do I increase attendance at my events?
Send invitations early, make it easy to RSVP, and follow up with reminders. Choose dates based on actual attendee availability rather than guessing. Events that align with your audience's schedule naturally see higher turnout.
Can I use the same workflow for virtual and in-person events?
Yes. The 6-phase framework applies to both formats. The main differences show up in Phase 3 (logistics), where virtual events swap venue coordination for platform setup and tech testing. Every other phase, from goal setting to follow-up, works the same way.
How do I handle last-minute cancellations?
Build a buffer into your planning. Over-invite by 10 to 15 percent for casual events, knowing that some people will drop off. For ticketed events, create a waitlist so you can fill spots quickly. Always confirm RSVPs with a reminder 24 to 48 hours before the event.
What should I include in a post-event survey?
Keep it short (5 questions or fewer). Ask about overall satisfaction, the most valuable part of the event, one thing to improve, likelihood to attend again, and an open-ended comment box. Send the survey within 24 hours while the experience is still fresh.
Ready to schedule your next group event without the headache? Find the perfect dates in minutes with WhenNOT.