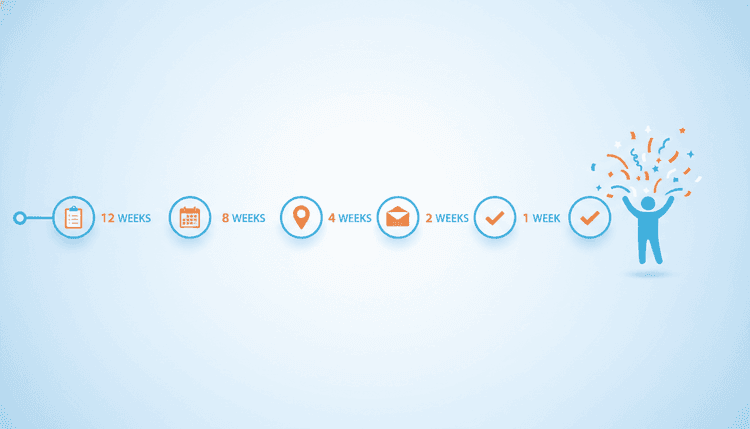
Planning an event without a timeline is like driving without a map. You might get there, but you will waste time, miss turns, and feel stressed the whole way. A structured week-by-week countdown keeps every task on track, so nothing slips through the cracks.
Quick answer: Start planning 12 weeks before your event. Work backward from event day, hitting key milestones at 8, 4, 2, and 1 week out. This countdown approach breaks overwhelming to-do lists into manageable weekly chunks.
Table of Contents
- Why Every Event Needs a Planning Timeline
- 12 Weeks Before: Lay the Foundation
- 8 Weeks Before: Lock In the Details
- 4 Weeks Before: Promote and Confirm
- 2 Weeks Before: Final Preparations
- 1 Week Before: Last-Minute Checks
- Event Day: Your Hour-by-Hour Checklist
- After the Event: Follow-Up and Feedback
- FAQ
Why Every Event Needs a Planning Timeline
Quick answer: A timeline turns chaos into a clear action plan. It helps you prioritize tasks, avoid last-minute panic, and keep your whole team aligned.
Most events fail not because of bad ideas but because of bad timing. Sending invitations too late means low turnout. Booking a venue too close to the date means fewer options and higher prices. Forgetting to confirm vendors the week before means nasty surprises on event day.
A planning timeline solves all of this. It gives every task a deadline and every team member a clear role. Whether you are organizing a corporate conference, a community fundraiser, or a family reunion, the countdown format works the same way.
Here is why it matters:
- Reduces stress. You always know what needs to happen next.
- Prevents budget overruns. Early bookings often come with better rates.
- Improves attendance. Timely invitations and reminders boost RSVPs.
- Keeps your team accountable. Everyone knows their deadlines.
Think of this timeline as your event's backbone. You can adjust the details based on your event size and type, but the structure stays the same.
12 Weeks Before: Lay the Foundation
Quick answer: Define your goals, set your budget, identify your audience, and build your core team. These early decisions shape everything that follows.
Three months out is when you set the direction for your entire event. Rush this stage, and you will pay for it later with scope creep, budget confusion, and misaligned expectations.
Define Goals, Budget, and Audience
Start with three questions:
- What is the purpose of this event? (Networking, celebration, education, fundraising)
- Who is your target audience? (Employees, clients, community members, family)
- What is your total budget?
Write down specific, measurable goals. "Host a successful event" is vague. "Attract 200 attendees and generate 50 qualified leads" gives you something to plan around.
Break your budget into categories:
| Category | Typical % of Budget |
|---|---|
| Venue | 25-35% |
| Catering | 20-30% |
| Entertainment/Speakers | 10-15% |
| Marketing/Invitations | 5-10% |
| Decor and Supplies | 5-10% |
| Contingency | 10-15% |
Keep 10-15% as a contingency fund. Unexpected costs always show up, and you want a buffer instead of a crisis.
Assemble Your Team
No one should plan an event alone. Even small gatherings benefit from splitting responsibilities.
Assign clear roles:
- Event lead: Owns the timeline and makes final decisions.
- Logistics coordinator: Handles venue, vendors, and equipment.
- Communications lead: Manages invitations, RSVPs, and promotions.
- Day-of coordinator: Runs the show on event day.
For smaller events, one person might wear multiple hats. That is fine. The key is that every responsibility has a name attached to it.
This is also the time to start researching venues. Look at 3-5 options, check availability for your preferred dates, and request quotes. If you already know how to plan a community event, you will have a head start here.
8 Weeks Before: Lock In the Details
Quick answer: Book your venue, confirm vendors, and finalize your event schedule. This is where your plans become commitments.
Two months out is crunch time for decisions. Every week you delay a booking, you lose options. Lock things down now so you can focus on promotion and fine-tuning later.
Venue, Vendors, and Scheduling
By now, you should have your top venue choice. Sign the contract. Confirm:
- Date and time
- Room setup and layout
- AV equipment availability
- Catering minimums and menu options
- Parking and accessibility
Next, book your vendors. Caterers, photographers, DJs, speakers, and rental companies all get busier as your event date approaches. The earlier you book, the more negotiating power you have.
Here is where scheduling gets tricky, especially for events with multiple organizers or stakeholders. You need to find dates that work for your venue, your vendors, your speakers, and your attendees.
Instead of sending endless email chains back and forth, use WhenNOT to find the best dates for your group. Create a poll, share it with your team and key participants, and let everyone mark their availability. You will see the optimal dates in minutes, not days.
Also finalize your event schedule at this stage:
- Opening and registration time
- Session or activity blocks
- Break times
- Closing remarks or wrap-up
Write it all down. Share it with your team. If your event follows a structured event planning workflow, this step will feel natural.
4 Weeks Before: Promote and Confirm
Quick answer: Send invitations, launch promotions, and start tracking RSVPs. One month out is your marketing push.
Invitations and RSVPs
Your invitations should go out no later than 4 weeks before the event. For formal or corporate events, consider sending a save-the-date at the 8-week mark and the full invitation now.
Choose the right type of invitation for your audience. A casual team outing might need just a group chat message. A corporate gala needs a formal digital or printed invitation.
Your invitation should include:
- Event name, date, time, and location
- RSVP deadline (set it for 2 weeks before the event)
- Dress code or theme, if applicable
- Contact information for questions
- A clear call to action (RSVP link or reply instructions)
Track your RSVPs in one place. Scattered replies across email, text, and DMs will drive you crazy. A solid RSVP management system makes this painless.
Promote your event across relevant channels:
- Email newsletters
- Social media posts
- Internal company announcements
- Community boards or group chats
- Partner or sponsor networks
Timeline by Event Type: How Far Ahead Should You Start?
Not every event needs 12 weeks. Here is a comparison to help you calibrate:
| Event Type | Start Planning | Send Invites | Confirm Details | Key Consideration |
|---|---|---|---|---|
| Casual gathering (BBQ, game night) | 4-6 weeks | 2-3 weeks before | 1 week before | Flexibility is high; keep it simple |
| Family event (reunion, birthday party) | 6-8 weeks | 4 weeks before | 2 weeks before | Coordinate across generations and schedules |
| Corporate event (conference, team retreat) | 10-12 weeks | 6-8 weeks before | 4 weeks before | Venue contracts and speaker bookings take time |
| Formal event (gala, wedding, fundraiser) | 12+ weeks | 8-10 weeks before | 4-6 weeks before | Vendor lead times and guest lists are larger |
| Community event (festival, workshop) | 8-10 weeks | 4-6 weeks before | 2-3 weeks before | Permits, volunteers, and public promotion needed |
Adjust your countdown based on complexity. A backyard birthday does not need the same lead time as a 500-person conference.
2 Weeks Before: Final Preparations
Quick answer: Confirm every booking, finalize your headcount, and prepare all materials. Leave nothing to chance.
This is your "double-check everything" phase. Go through every detail:
- Confirm your venue reservation. Call or email your contact to reconfirm date, time, and setup.
- Confirm all vendors. Verify delivery times, setup requirements, and final costs.
- Finalize your guest count. Close RSVPs and share the final headcount with your caterer and venue.
- Prepare printed materials. Agendas, name tags, signage, and programs should be ordered or printed.
- Test your technology. If you use slides, microphones, projectors, or live-streaming tools, test them now.
- Brief your team. Hold a quick meeting to walk through the event-day schedule and assign final roles.
Create a contact sheet with phone numbers for every vendor, team member, and key participant. On event day, you need to reach people fast.
If you are coordinating a family event, this is also the time to send a friendly reminder to everyone with parking details, what to bring, and any last updates.
1 Week Before: Last-Minute Checks
Quick answer: Do a final walkthrough, send attendee reminders, and prepare your day-of kit. This week is about tying up loose ends.
Seven days out, your big decisions are made. Now focus on the small details that make or break the attendee experience.
Your checklist for this week:
- Send a reminder email or message to all attendees with the event schedule, location, and parking info.
- Do a site visit or virtual walkthrough of the venue. Check the layout, signage spots, and AV setup.
- Confirm the final timeline with your team. Make sure everyone knows when to arrive and what to do.
- Pack a day-of emergency kit: extra chargers, tape, markers, a first-aid kit, name tags, printed schedules, and cash for unexpected needs.
- Prepare welcome packets or swag bags if applicable.
- Check the weather forecast (for outdoor events) and have a backup plan ready.
This is not the time for major changes. If something big shifts, adapt quickly and communicate clearly to your team. Small adjustments are normal. Full overhauls this close to the event signal a planning gap earlier in the timeline.
Event Day: Your Hour-by-Hour Checklist
Quick answer: Arrive early, follow your schedule, delegate on the spot, and stay flexible. The day belongs to your attendees, so focus on their experience.
Here is a sample hour-by-hour flow you can adapt:
4-3 hours before the event:
- Arrive at the venue. Meet vendors and oversee setup.
- Check table arrangements, AV equipment, signage, and lighting.
- Do a sound check if you have speakers or music.
2-1 hours before:
- Brief your volunteers or team on their posts and responsibilities.
- Set out registration materials, name tags, and programs.
- Do a final walkthrough. Look at the event through an attendee's eyes.
Event start:
- Greet early arrivals and guide them to registration.
- Kick off the event on time. Delays set a bad tone.
During the event:
- Stick to the schedule but stay flexible for minor shifts.
- Designate one person to handle emergencies so the event lead stays focused.
- Take photos or assign someone to document the event.
Last hour:
- Begin wrap-up announcements 15-20 minutes before the end.
- Thank sponsors, speakers, and attendees.
- Share next steps: follow-up survey, future events, or community links.
After guests leave:
- Supervise teardown and cleanup.
- Collect any rented equipment for return.
- Do a quick debrief with your team while the experience is fresh.
After the Event: Follow-Up and Feedback
Quick answer: Send thank-you messages within 48 hours, gather feedback, and review your budget. Post-event tasks are what turn a one-time event into a repeatable success.
The event ended, but your work is not done yet. The follow-up phase is where you capture value and learn for next time.
Within 48 hours:
- Send a thank-you email to all attendees. Include photos, highlights, and any resources shared during the event.
- Thank your vendors, sponsors, and speakers personally.
- Post event photos and a recap on social media or your website.
Within 1 week:
- Send a feedback survey. Keep it short (5-7 questions). Ask about overall satisfaction, favorite moments, and suggestions for improvement.
- Review your budget. Compare planned vs. actual spending. Note where you went over and where you saved.
- Hold a team retrospective. Discuss what went well, what didn't, and what you would change next time.
Within 2 weeks:
- Share a summary report with stakeholders. Include attendance numbers, feedback highlights, and budget results.
- Archive your event files: contracts, vendor contacts, timelines, and photos. These are gold for planning your next event.
- Start a "lessons learned" document. Future-you will thank present-you.
FAQ
How far in advance should I start planning an event?
For most events, start 8-12 weeks ahead. Casual gatherings need 4-6 weeks. Large-scale or formal events (conferences, galas, weddings) benefit from 12 or more weeks of lead time. The bigger the guest list and the more vendors involved, the earlier you should start.
What is the most important thing to do first when planning an event?
Define your goals and budget. Every other decision flows from these two things. Without clear goals, you cannot measure success. Without a budget, you cannot make informed choices about venues, catering, or entertainment.
How do I coordinate schedules with a large planning team?
Use a group scheduling tool like WhenNOT to find dates and times that work for everyone. It eliminates the back-and-forth of email chains and group texts. Each person marks their availability, and you see the best options instantly.
What should I include in my event day emergency kit?
Pack extra phone chargers, a power strip, tape (duct tape and double-sided), scissors, markers, a stapler, a first-aid kit, printed copies of the schedule and vendor contacts, name tags, pens, cash, and breath mints. Prepare for the small things that can cause big headaches.
How do I handle last-minute cancellations or changes?
Stay calm and focus on what you can control. If a speaker cancels, have a backup activity or panel discussion ready. If attendance drops, adjust catering numbers immediately. Keep your vendor contact sheet handy so you can make quick calls. Build buffer time into your schedule so one delay does not cascade into a full disruption.
How do I measure whether my event was successful?
Compare your results against the goals you set at the 12-week mark. Track attendance numbers, feedback survey scores, social media engagement, leads generated (for business events), and budget adherence. Success looks different for every event, so always define it before the event starts.
Ready to schedule your next group event without the headache? Find the perfect dates in minutes with WhenNOT.