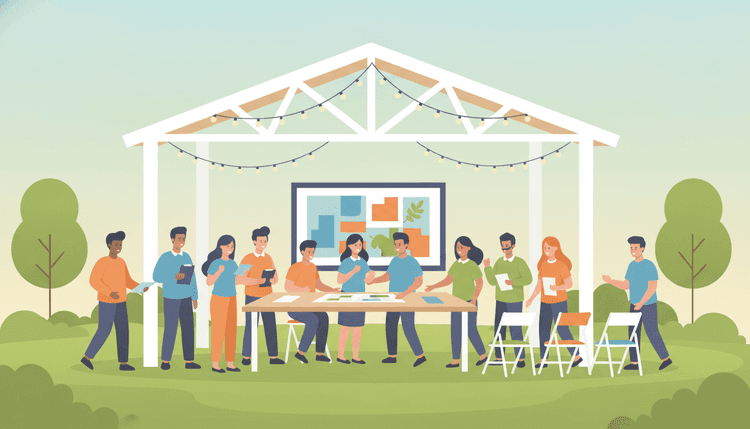
What Makes a Community Event Successful?
Quick answer: A successful community event starts with a clear purpose, lands on a date that works for most people, stays within budget, and creates a welcoming experience that keeps attendees talking long after it ends.
The difference between a forgettable gathering and one that strengthens your community comes down to planning. Successful events share a few common traits:
- Clear purpose. Every decision flows from knowing why you are hosting this event and who it serves.
- Strong attendance. The right date and effective promotion fill seats. A great event with low turnout still feels like a miss.
- Smooth logistics. Guests notice when things run well. They notice even more when they do not.
- Community connection. People leave feeling more connected to their neighbors, colleagues, or group members than when they arrived.
- Repeatable structure. The best community events become annual traditions because the organizers built a process they can reuse.
Whether you are planning a block party, a charity fundraiser, or a seasonal festival, these fundamentals stay the same. The steps below walk you through each one.
Step 1: Define Your Event Purpose and Audience
Quick answer: Start by answering two questions: "Why are we hosting this?" and "Who is it for?" Your answers shape every decision that follows.
Before you book anything or send a single invitation, get clear on your event's purpose. A neighborhood cleanup has different needs than a cultural festival or a fundraising gala. Writing down your goals keeps the planning committee aligned and prevents scope creep.
Define your purpose with specifics:
- "Raise $5,000 for the community garden renovation" is useful
- "Build community spirit" is too vague to guide decisions
Know your audience:
- Size: Are you expecting 30 neighbors or 300 community members?
- Demographics: Families with young children? Seniors? Working professionals? A mix of all three?
- Accessibility needs: Mobility accommodations, dietary restrictions, language considerations, and sensory-friendly spaces all matter.
- Interests: What draws this group together? Shared hobbies, geography, cultural identity, or a common cause?
Your purpose and audience profile become the filter for every choice ahead: venue size, budget allocation, activity selection, and promotion channels. Skip this step and you will second-guess yourself at every turn.
Step 2: Build Your Planning Committee
Quick answer: Recruit 3 to 8 volunteers and assign clear roles so no single person carries the entire event on their shoulders.
Community events fail when one person tries to do everything. That person burns out, details slip through the cracks, and the event suffers. A small, organized committee spreads the work and brings diverse skills to the table.
Start recruiting early. Reach out to people who have organized events before, who have strong local connections, or who simply show up reliably. Quality beats quantity here.
Roles and Responsibilities for Community Event Organizers
Assign these core roles based on each person's strengths:
| Role | Responsibilities |
|---|---|
| Event Lead | Sets the vision, runs planning meetings, makes final decisions, keeps the timeline on track |
| Logistics Coordinator | Books venue, arranges equipment rentals, manages setup and teardown |
| Budget Manager | Tracks spending, manages sponsorships or fundraising, handles vendor payments |
| Promotion Lead | Creates flyers, manages social media, coordinates with local media and community boards |
| Volunteer Coordinator | Recruits and schedules day-of volunteers, assigns tasks, runs briefings |
| RSVP and Registration Manager | Tracks attendance, manages sign-ups, communicates updates to registrants |
Tips for running your committee:
- Hold brief weekly check-ins (15 to 20 minutes) as the event approaches
- Use a shared document or group chat so everyone sees progress in real time
- Set deadlines for each role's milestones and review them together
- Make decisions as a group but give the Event Lead the final call when the team cannot agree
For a deeper framework on structuring your planning process, check out this event planning workflow guide.
Step 3: Pick the Perfect Date with Group Scheduling
Quick answer: Poll your planning committee and key community members before locking in a date. The best event in the world flops if nobody can attend.
Choosing a date might sound simple, but it is one of the most common reasons community events underperform. Pick the wrong weekend and you compete with school events, holidays, local festivals, or just bad weather.
Before you pick a date, check for conflicts:
- School calendars (avoid exam weeks, school breaks, and graduation weekends)
- Religious and cultural holidays
- Other community events in your area
- Major sports events or local traditions
- Seasonal weather patterns for your region
Once you have three to five potential dates, poll your committee and key stakeholders. Sending a group text asking "When works for you?" creates chaos with 20 different replies across multiple threads. A scheduling poll gives you a clean view of everyone's availability in one place.
How WhenNOT Helps You Find When Everyone Is Free
WhenNOT makes group scheduling painless. Create a poll with your potential dates, share one link with your committee or community group, and watch availability results update in real time. No app downloads, no account sign-ups for your participants. Everyone marks when they can and cannot attend, and you see the best overlap at a glance.
This works especially well for community events where your planning committee, key volunteers, and featured guests all need to be present. Instead of spending a week trading messages, you get a clear answer in a day or two.
Start a free scheduling poll and lock in your event date in minutes.
Timing tips for community events:
- Saturday mornings and early afternoons get the highest attendance for family-friendly events
- Weekday evenings (6 PM to 8 PM) work well for adult-focused gatherings like town halls or networking events
- Plan outdoor events during your region's mildest season
- Give yourself at least 6 to 8 weeks between confirming the date and the event itself
Step 4: Secure a Venue and Set Your Budget
Quick answer: Match your venue to your expected attendance, activity needs, and budget. Then build a realistic budget with a 10 to 15 percent contingency fund.
With your date confirmed, move quickly on the venue. Popular community spaces book up fast, especially on weekends.
Venue options for community events:
- Public parks and pavilions: Free or low-cost, great for large groups, usually require a permit for events over 25 people
- Community centers: Affordable, often have kitchen facilities and AV equipment, indoor backup for weather
- School gyms or auditoriums: Available on weekends and evenings, good for presentations or performances
- Houses of worship: Many offer event space to community groups at low or no cost
- Library meeting rooms: Free for smaller gatherings, good for workshops or planning meetings
- Rented event spaces: More expensive but offer professional amenities and setup support
Before you sign anything, confirm:
- Maximum capacity matches your expected headcount plus a 15 percent buffer
- Restroom access, parking, and ADA accessibility
- What is included (tables, chairs, AV equipment) versus what you need to rent
- Permit requirements and insurance needs
- Setup and teardown time allowances
- Noise restrictions or curfew times
Building your budget:
| Category | Typical Allocation | Notes |
|---|---|---|
| Venue rental | 20 to 30% | Free if using public parks with permits |
| Food and beverages | 25 to 35% | Potluck or sponsorship can reduce this significantly |
| Promotion and signage | 5 to 10% | Digital channels keep costs low |
| Entertainment or activities | 10 to 20% | Local performers may volunteer or offer discounted rates |
| Supplies and equipment | 10 to 15% | Tables, chairs, decorations, first aid kit |
| Contingency | 10 to 15% | Non-negotiable. Something unexpected always comes up |
Funding sources for community events:
- Local business sponsorships (offer logo placement on banners and programs)
- Small community grants from local government or foundations
- Ticket sales or suggested donations
- Crowdfunding through community social media groups
- Potluck contributions to reduce food costs
Step 5: Promote Your Community Event
Quick answer: Start promotion 4 to 6 weeks before the event. Use a mix of digital and physical channels to reach every segment of your community.
Even the best-planned event needs people to show up. Promotion is where many community organizers fall short because they rely on a single channel or start too late.
Your promotion timeline:
- 6 weeks out: Announce the event on social media and community groups. Create a simple event page or flyer.
- 4 weeks out: Distribute printed flyers to local businesses, community boards, libraries, and schools. Send email announcements to community mailing lists.
- 2 weeks out: Post reminders on social media. Ask committee members to share with their personal networks. Contact local media for event listings.
- 1 week out: Final push with countdown posts, "last chance to RSVP" reminders, and direct outreach to anyone who expressed interest but has not confirmed.
- Day before: Send a final reminder with event details, parking info, and what to bring.
Free Promotion Ideas That Actually Work
You do not need a marketing budget to fill your event. These channels cost nothing but time:
- Community social media groups: Facebook neighborhood groups, Nextdoor, and local Reddit communities are goldmines for reaching nearby residents
- Word of mouth: Ask every committee member to personally invite 10 people. Personal invitations convert at a much higher rate than posts or flyers.
- Local business bulletin boards: Coffee shops, laundromats, grocery stores, and gyms often have community boards where you can post flyers for free
- School newsletters and parent groups: If your event is family-friendly, schools are your best distribution channel
- Community email lists: HOA newsletters, church bulletins, and local organization mailing lists reach people who do not use social media
- Partnerships with local organizations: Partner with a local nonprofit, business association, or cultural group to co-promote and tap into their audience
- Press releases to local media: Community newspapers and local news websites often publish free event listings
Make your promotional materials clear and scannable:
- Event name and one-line description
- Date, time, and location with a map link
- What to expect (activities, food, entertainment)
- How to RSVP or register
- Contact info for questions
Step 6: Manage RSVPs and Attendance
Quick answer: Use a simple registration system to track who is coming. Accurate headcounts prevent food waste, seating shortages, and overcrowding.
Knowing how many people will attend changes everything: how much food you order, how many chairs you set up, how many volunteers you need, and whether your venue is the right size.
RSVP management options:
- Free online forms: Google Forms or similar tools work for basic headcount tracking
- Event registration platforms: Use these for ticketed events or events that need attendee information
- Social media event pages: Good for visibility but unreliable for accurate headcounts (many people click "interested" without attending)
- Sign-up sheets: Work for smaller community groups where you see people regularly
Best practices for RSVP management:
- Set a clear RSVP deadline (10 to 14 days before the event)
- Send two reminders: one at the halfway point and one 3 days before the deadline
- Ask for essential info only: name, number of guests, dietary restrictions, and accessibility needs
- Plan for 15 to 20 percent more attendees than your RSVP count (walk-ins happen at community events)
- Plan for 10 to 15 percent no-shows from confirmed RSVPs
For a detailed breakdown of tracking responses and reducing no-shows, read this guide on event RSVP management.
Step 7: Execute Event Day Like a Pro
Quick answer: Create a detailed day-of timeline, assign roles to every volunteer, and build in buffer time so minor delays do not derail the schedule.
Event day is about execution, not planning. If you followed steps 1 through 6, your decisions are made. Now you coordinate, troubleshoot, and keep the energy positive.
Day-of timeline template:
- 3 to 4 hours before: Core team arrives for setup. Arrange tables, chairs, signage, and decorations. Test AV equipment and sound.
- 2 hours before: Food and beverage setup. Volunteer briefing (15 minutes covering roles, locations, and emergency procedures).
- 30 minutes before: Final walkthrough. Check restrooms, parking signs, registration table, and first aid station.
- Event start: Greet guests, direct foot traffic, start programming on schedule.
- Mid-event: Check in with all volunteer stations. Restock food and supplies as needed. Take photos for future promotion.
- Event end: Thank attendees. Begin cleanup immediately.
- 1 hour after: Complete teardown. Collect all supplies and equipment. Do a final sweep of the venue.
Day-of essentials checklist:
- Printed timeline for every volunteer
- Contact list for all vendors, committee members, and venue staff
- First aid kit and emergency plan
- Extra supplies (tape, scissors, markers, zip ties, extension cords, garbage bags)
- Signage for parking, registration, restrooms, and activities
- Cash box or payment method for any sales
- Camera or designated photographer
- Feedback cards or QR code linking to a post-event survey
Troubleshooting tips:
- Assign one person as the "floater" who handles unexpected problems so the Event Lead can stay focused on the big picture
- Keep a 15-minute buffer between scheduled activities
- Have a rain plan for outdoor events (covered area, indoor backup, or quick-reschedule option using a scheduling poll)
- Brief volunteers on common questions attendees will ask (parking, restrooms, schedule, Wi-Fi)
Community Event Ideas for Every Season
Quick answer: Match your event type to the season for the best turnout and experience. Here are proven community event ideas organized by time of year.
| Event Type | Best Season | Group Size | Complexity | Budget Level |
|---|---|---|---|---|
| Block party or street fair | Summer | 50 to 500+ | Medium | Medium |
| Community garden day | Spring | 15 to 50 | Low | Low |
| Outdoor movie night | Summer | 30 to 200 | Medium | Medium |
| Holiday craft market | Fall/Winter | 50 to 300 | High | Medium to High |
| Neighborhood cleanup | Spring/Fall | 10 to 50 | Low | Low |
| Cultural food festival | Summer/Fall | 100 to 500+ | High | High |
| Family fun run or walk | Spring/Fall | 50 to 300 | Medium | Medium |
| Town hall or community forum | Any season | 20 to 100 | Low | Low |
| Charity auction or gala | Winter | 50 to 200 | High | High |
| Outdoor concert or open mic | Summer | 30 to 200 | Medium | Medium |
| Back-to-school supply drive | Late Summer | 20 to 100 | Low | Low |
| Winter holiday celebration | Winter | 50 to 300 | Medium | Medium |
Picking the right event for your community:
- New communities or first-time organizers: Start with a low-complexity event like a neighborhood cleanup or potluck. These build relationships and test your organizing process without high stakes.
- Established groups with experience: Go bigger with cultural festivals, charity galas, or multi-day events. Your committee knows the process and your community expects more.
- Budget-limited groups: Focus on potluck-style events, volunteer-driven activities, and free venues like public parks. Creativity beats budget every time.
For more group activity inspiration, browse this list of social event ideas for groups.
Community Event Planning Checklist
Use this checklist to track your progress from start to finish:
8+ weeks before:
- Define event purpose and target audience
- Recruit planning committee and assign roles
- Poll committee and stakeholders for the best date
- Research venue options
6 weeks before:
- Confirm venue and sign any contracts
- Set final budget with contingency fund
- Begin promotion on social media and community channels
- Reach out to potential sponsors
4 weeks before:
- Distribute printed flyers and send email announcements
- Open RSVPs or registration
- Confirm entertainment, speakers, or activity providers
- Order supplies and equipment rentals
2 weeks before:
- Send RSVP reminders
- Finalize volunteer schedule and assignments
- Confirm all vendors and deliveries
- Create day-of timeline and print copies
1 week before:
- Final promotion push and reminder to registrants
- Brief all volunteers on roles and emergency procedures
- Prepare signage, name tags, and printed materials
- Confirm weather backup plan for outdoor events
Day of:
- Arrive early for setup
- Run volunteer briefing
- Execute timeline, troubleshoot, and enjoy the event
- Collect feedback and take photos
After the event:
- Send thank-you messages to volunteers, sponsors, and vendors
- Share photos and highlights on social media
- Review budget: actual spend versus planned
- Document lessons learned for next time
FAQ
How much does it cost to organize a community event?
Costs range from nearly zero to several thousand dollars depending on the event type and size. A neighborhood cleanup or potluck can cost under $100 using volunteer labor and donated supplies. A block party for 200 people typically runs $500 to $2,000 for permits, food, and entertainment. Larger festivals or galas can cost $5,000 or more. Sponsorships, donations, and potluck contributions significantly reduce out-of-pocket costs.
How far in advance should I start planning a community event?
Start at least 8 weeks before the event for small to medium gatherings (under 100 people). For large events with 200 or more attendees, begin 3 to 6 months ahead. The extra lead time gives you room to secure permits, recruit sponsors, and promote effectively. The first step should always be finding a date that works for your core team and key attendees.
How do I find volunteers for my community event?
Start with your planning committee's personal networks. Post volunteer opportunities in community social media groups, on Nextdoor, and at local businesses. Contact local schools and colleges (students often need community service hours). Reach out to local nonprofit organizations that share your event's mission. Make volunteering easy by offering specific shifts (2 to 3 hours) with clear tasks rather than asking for all-day commitments.
What permits do I need for a community event?
Permit requirements vary by location, but common ones include: park or public space use permits (required for most groups over 25), food handling permits (if serving prepared food), noise permits (for amplified music or speeches), road closure permits (for block parties or street fairs), and temporary alcohol permits. Contact your local parks department and city clerk's office 6 to 8 weeks before the event to learn what applies to your situation.
How do I handle bad weather for an outdoor community event?
Have a backup plan before the day arrives. Options include moving to a covered pavilion, shifting to an indoor community center, or rescheduling entirely. Make your weather decision 24 to 48 hours before the event so you can communicate the change to attendees. If you need to reschedule, a quick scheduling poll gets your group realigned fast without the chaos of group texts.
How do I measure whether my community event was successful?
Track attendance versus your goal, actual spending versus budget, and qualitative feedback from attendees and volunteers. Send a short survey (3 to 5 questions) within 48 hours while the experience is fresh. Ask what people enjoyed most, what they would change, and whether they would attend again. For fundraising events, compare dollars raised against your target. Document everything so you can improve next time.
What is the best way to coordinate schedules for a community event planning committee?
Skip the endless group text threads. Use a scheduling tool like WhenNOT to poll your committee on meeting times and event dates. Share one link, let everyone mark their availability, and pick the time with the most overlap. It takes minutes instead of days of back-and-forth messages.
Ready to schedule your next group event without the headache? Find the perfect dates in minutes with WhenNOT.